Bright Green Falafel
This post contains affiliate links, which means I may receive a small commission at no extra cost to you. I only share products and services I have personally used and love. Disclosure here.
Ever since I can remember trying falafel for the first time, I’ve been a big fan of it. But really, it’s kind of hard not to fall in love with crispy fried balls of chickpeas. And over the years, I’ve definitely had my fair share of great and not so great ones. These bright green falafel balls are great, if I do say so myself. I love ordering falafel at my favourite spot in Toronto (Parallel restaurant is the best), so this is my attempt to make them at home (obviously, they’re not as good, but still very delicious!). They’re packed with lots of fresh herbs, serrano and a few spices and they do come together pretty easily. With that being said, it’s still a bit of a process to make them. Although, you end up with quite a bit, so the time is well spent as you can stock your fridge or freeze them for later.

Why You’ll Love These Bright Green Falafel
- Packed with flavour from fresh herbs and seasonings.
- Easy to meal prep with them and they can be made in stages.
- Crispy on the outside and soft on the inside.
- Fairly foolproof recipe using my tips and suggestions.
- A delicious plant-based option.
Ingredients
Here’s everything you’ll need to make these beautiful and easy super green falafel.
- dried chickpeas: there is no need to cook them. Using dried chickpeas that have been soaked overnight results in the best texture (no mushy falafels here!)
- fresh herbs: cilantro, parsley and mint all provide flavour, nutrition and of course make these bright green falafels shine.
- serrano pepper: for some heat and flavour (can be skipped, or remove the seeds for less heat).
- fresh garlic cloves
- ground cumin
- kosher salt
- ground cardamom
- lemon juice
- chickpea flour: any flour will do, you only need a tiny bit to help these falafels hold together.
- baking powder: this helps the falafel stay light and fluffy.
- avocado oil (or other neutral oil), for frying

How to Make These Vibrant Green Falafel
Making these easy green falafels at home is fairly straightforward. You do need some prep time to soak the chickpeas overnight and refrigerate the dough before forming into balls.

Here’s how to make them at home.
Rinse dry chickpeas and then transfer to a large bowl. Cover with water and let sit overnight, covered with a clean kitchen towel.

Drain the chickpeas and add to a food processor (if using a smaller food processor, do this in two batches).
Add the herbs (cilantro, parsley and mint), pepper, garlic, cumin, salt, cardamom and lemon juice to the food processor.

Process on high until combined, stopping to scrape down the sides as needed. A little bit of chunkiness from the chickpeas is ok, but relatively smooth in texture is the best.

Transfer the chickpea mixture to a large bowl and add the flour and mix to combine. Transfer to the fridge and let it sit for about 20 to 30 minutes, this helps the mixture firm up a bit.
Sprinkle in the baking powder and mix with a spoon. Using a cookie scoop (or your hands), roll the mixture into balls, slightly bigger than a golf ball. If the mixture is not holding together, add a little more flour as needed. Repeat until all balls are formed.

How to Shallow Fry Falafel
Shallow frying at home is really easy so long as you have a few things.
I recommend using a dutch oven or a well seasoned wok.
I prefer deep or shallow frying in a wok as the bottom isn’t as deep so you don’t have to use as much oil. I love this carbon steel wok from Made In which I’ve been using for about a year and highly recommend it.
Heat a large dutch oven/pot or wok over medium heat. Pour in enough oil to fill up the bottom and around 1 1/2 inches up the side (for a shallow fry).
Once the oil is hot (use a temperature gun to measure that it is between 375ºF and 400ºF). Carefully drop in each ball (working in batches) and fry for about two minutes per side, adjusting the heat as needed to maintain a temperature of 350ºF.
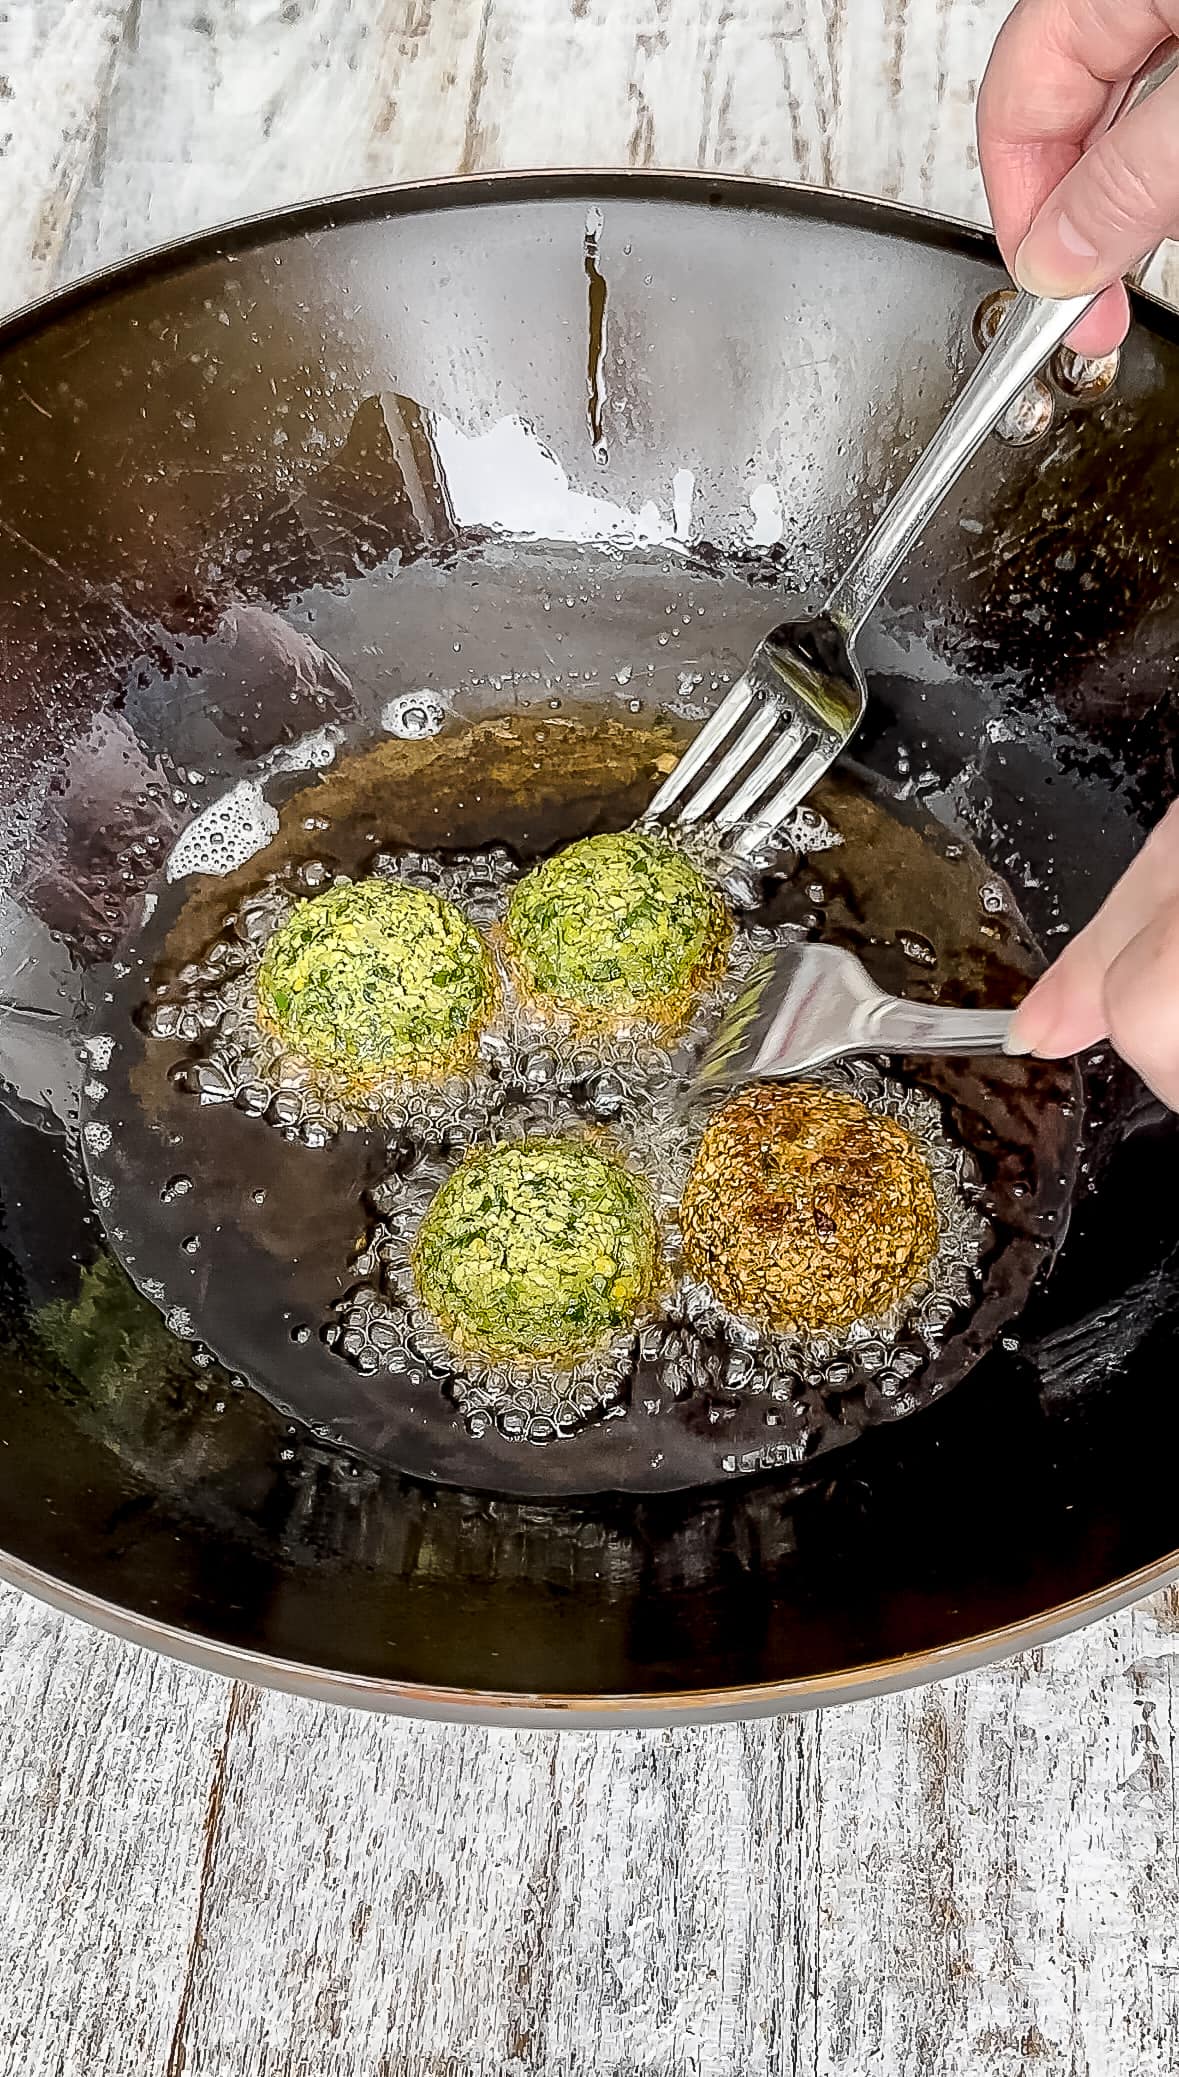
Falafel should be deep golden grown. Remove with a slotted spoon and place on a plate lined with paper towel.


Tips for Making Falafel at Home
- Watch the temperature of the oil: using an infrared thermometer temperature gun, like this one I have makes this so much easier. If the oil isn’t hot enough, food will be greasy when fried in it and if it’s too hot, it will burn.
- Don’t overcrowd: when you drop in the falafel, the temperature of the oil will drop (just as it would with any food you are frying). So it’s best not to overcrowd the pot. Work in batches, frying around four to six at a time, depending on the size of the pot/wok or dutch oven you’re using.
- Refrigerate the falafel mixture: this makes it easier to form as the mixture becomes a little more firm after some time in the fridge. 30 minutes is sufficient, or leave them covered overnight if you’d like.
- Wash and dry your herbs very well: be sure to pat dry your herbs very well with paper towel, otherwise this can make the falfel dough too wet.
- Add green onion: I’ve also made these with the addition of chopped fresh green onion in the mix. Add one to two stalks if you’d like.
- Use a cookie scoop: this makes the green falafel more uniform and a lot easier to form.
- Flour: the chickpea mixture should hold together enough to form them into balls with only two to three tablespoons of flour. Add a little extra (about 1 tsp) at a time if you need more.

Substitutions
- Avocado oil: use another neutral oil to fry in. I prefer avocado as it’s a high heat oil. You can drain the oil through cheesecloth and re-use it as frying oil so you get a few uses out of it.
- No cilantro: add more parsley and/or mint.
- Serrano pepper: omit, or use a jalapeño instead.

How to Bake Green Falafel in the Oven
If you prefer to bake these green falafel in the oven, here’s how to do that.
I’d suggest baking them on an oiled/greased pan at 425ºF for 25 to 30 minutes, flipping carefully halfway through. Be sure to spray the tops of the falafel with oil before going in the oven as well.
Flatten the balls slightly into small patties as this will be a better texture and shape for baking.
If you do bake them, they will get a little crispy on the outside, but not as much as you get from pan frying/shallow frying, obviously. They are still delicious!
How to Air Fry Falafel
If you prefer to air fry the falafel balls, here’s how to do that.
Preheat the air fryer to 375ºF.
Spray the basket with oil. Add the falafel balls to the air fryer basket being sure to not have them overlapping. Spray the tops of the balls.
Bake for 14 to 16 minutes, flipping halfway through. Spray more oil if needed at the halfway point.
Always check on the falafel at the halfway point to see how they are doing. Adjust the temperature if needed to reduce the browning.
This is the air fryer I use and love it.

Serving and Storage
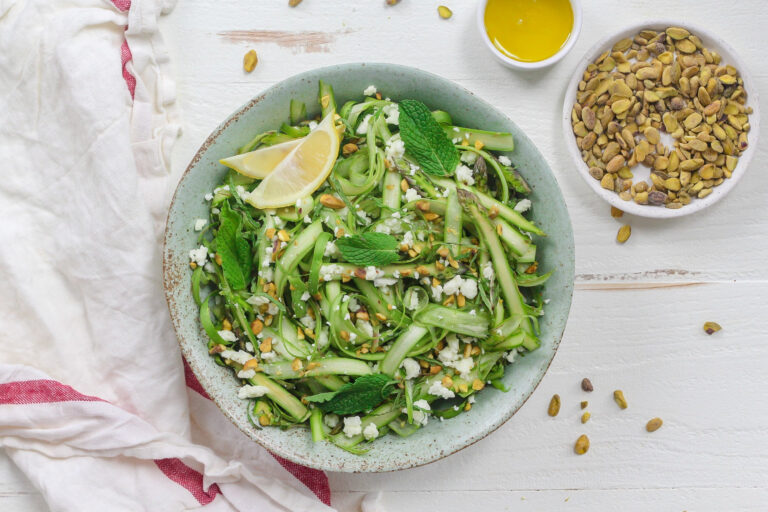
I love serving falafel inside pita with hummus, tahini drizzled on top, fresh greens inside, chopped cucumber and more fresh herbs.
They’re also delicious served as a protein source on top of salads, or on their own with a drizzle of tahini dressing. The ones pictured below are served with a beet tahini dressing from Parallel Brothers.
To make a drizzly tahini dressing, simply add a few heaping spoonfuls of tahini to a bowl. Add a squeeze of lemon juice and then slowly drizzle in water while whisking together. The mixture should be thin and drippy and the colour will change to a lighter colour.
Store leftover fried falafel in the fridge for up to three days in a sealed container.
Store leftover fried falafel in the freezer in a sealed freezer safe plastic bag for up to three months. Defrost overnight and then reheat in the oven, or in the air fryer until warmed through.
You can also store uncooked falafel mixture (in balls) in the freezer as well. Place the green falafel balls on a baking sheet lined with parchment paper and freeze. When they harden, transfer the falafel balls into a freezer safe bag. They will keep well in the freezer for about a month or so. Then simply bake, or fry once defrosted.

More Dinner Recipes:
- Honey Lime Chicken Thighs
- Thai Turkey Meatballs
- Salmon Tacos with Thai Curry Sauce
- Miso Carbonara
- Gochujang Korean Chicken Bowls with Rice
- Chili Crisp Pasta
- Al Pastor Salmon Tacos
- Kimchi Burgers
- Air Fryer General Tso Chicken
Are you ready to make this? Let’s get to it!
As always, if you make these vibrant green falafel please share with me, by tagging me on Instagram or leave a comment and/or review below. I truly love seeing and hearing form you!
This post contains affiliate links, which means I may receive a small commission at no extra cost to you. I only share products and services I have personally used and love. Disclosure here.
Print
Bright Green Falafel
- Prep Time: 15
- Inactive Time: 30
- Cook Time: 25
- Total Time: 1 hour 10 minutes
- Yield: 5 1x
- Category: Dinner
- Method: Frying
- Cuisine: Middle Eastern
Description
These bright green falafel are perfectly crispy on the outside and fluffy on the inside. Enjoy them on their own with tahini dressing or in a pita.
Ingredients
- 1 1/2 cups dried chickpeas
- 1 1/2 cups cilantro, packed (torn, tender stems ok, pat dry with paper towel)
- 1 1/2 cups parsley, packed (torn, tender stems ok, pat dry with paper towel
- 1/2 cup mint, packed (torn, stems removed, pat dry with paper towel)
- 1 serrano pepper (seeds removed for less heat, roughly chopped)
- 3 cloves garlic (smashed)
- 2 tsps cumin (ground)
- 1 1/2 tsps kosher salt
- 1/4 tsp cardamom (ground)
- 1 tbsp lemon juice
- 2 to 3 tbsps chickpea flour (as needed to hold together)
- 3/4 tsp baking powder
- avocado oil (or other neutral oil), for frying
Instructions
- Place dry chickpeas in a large bowl. Cover with water and let sit overnight, covered with a clean kitchen towel.
- Drain the chickpeas and add to a food processor (if using a smaller food processor, do this part in two batches).
- Add the herbs (cilantro, parsley and mint), pepper, garlic, cumin, salt, cardamom and lemon juice to the food processor.
- Process on high until combined, stopping to scrape down the sides as needed. A little bit of chunkiness from the chickpeas is ok, but relatively smooth in texture is the best.
- Transfer the chickpea mixture to a large bowl and add the flour and mix to combine. Transfer to the fridge and let it sit for about 30 minutes, this helps the mixture firm up a bit.
- Sprinkle the baking powder into the chickpea mixture and mix with a spoon to incorporate. Using a cookie scoop (or your hands), form the mixture into balls, slightly bigger than a golf ball. If the mixture is not holding together, add a little more flour as needed. Repeat until all balls are formed.
- Heat a large dutch oven/pot or wok over medium heat. Pour in enough oil to fill up the bottom and around 1 1/2 inches up the side (for a shallow fry).
- Once the oil is hot (use a temperature gun to measure that it is between 375ºF and 400ºF). The temperature will drop once you start frying. Carefully drop in each ball (working in batches) and fry for about two minutes per side, adjusting the heat as needed to maintain a temperature of 350ºF. Falafel should be deep golden grown. Remove with a slotted spoon and place on a plate lined with paper towel. Immediately sprinkle a bit of kosher salt on top while still hot.
- Serve in a pita with your choice of toppings, or on their own with a tahini dressing.
Notes
This recipe makes about 20 balls.
Dry your herbs: to prevent the chickpea mixture from being too wet, it’s important to dry your herbs very well with paper towel.
Watch the temperature of the oil: using an infrared thermometer temperature gun, like this one I have makes this so much easier. If the oil isn’t hot enough, food will be greasy when fried in it and if it’s too hot, it will burn.
Refrigerate the mixture: you can store the chickpea mixture in the fridge overnight if you want to make these in advance.